
Key Takeaways
- The fastest reliable workflow is Object Selection -> Select and Mask -> Layer Mask output -> edge cleanup checks.
- Clean cutouts come from method selection by subject type (hard edges vs hair vs translucent objects), not one universal tool.
- Most “bad cutouts” are QA misses: halos, color fringing, and edge softness that only appear on contrasting backgrounds.
- For high-volume ecommerce production, Photoshop remains strong for precision edits, while Lumabox follow-on workflows improve speed and consistency.
If you are trying to learn how to cutout an image in Photoshop, you probably do not need another generic “click this button” tutorial. You need results that hold up when exported and placed on real backgrounds, product pages, and ads.
This guide is practical: choose the right method by subject type, run a repeatable clean-edge workflow, and use quick QA checks so your cutouts do not fail later in production.
For broader editing context, see our professional product photo editing guide.
Choose the right cutout method first (the biggest quality lever)
Before selecting anything, classify your subject. Method choice drives edge quality more than raw Photoshop skill.
| Subject type | Best primary method | Why it works | Common risk |
|---|---|---|---|
| Hard-edged product (box, bottle, device) | Object Selection + Select and Mask (small feather) | Fast and accurate boundaries | White fringe on bright products |
| Hair/fur | Select Subject + Select and Mask Refine Hair | Better micro-edge retention | Gray/colored halo |
| Transparent/translucent edges (glass, veils) | Channels/manual mask refinement | Better control in low-contrast regions | Over-cut edges and fake transparency |
| Geometric objects with crisp lines | Pen Tool path + mask conversion | Maximum precision for corners/lines | Time cost |
If your subject has mixed edges (for example, a person holding a product), combine methods: Object Selection for body/product and Refine Hair for top-edge detail.
Step-by-step: the clean-edge Photoshop workflow
Use this baseline flow for most cutouts.
1) Prepare the file for non-destructive edits
- Duplicate your background layer.
- Work in RGB and keep the original untouched.
- Add a temporary solid color layer under your subject (bright green or magenta) to reveal hidden edge defects.
2) Make the initial selection
- Use Object Selection and drag around the subject.
- For missed areas, hold Shift and paint with Quick Selection.
- Avoid over-brushing near fine edges; rough over-selection is fine if you refine next.
3) Open Select and Mask
With the active selection:
- Click Select and Mask.
- View mode: On Black or On Layers.
- Start with these safe defaults:
- Radius: low to medium
- Smooth: low
- Feather: very low (usually under 1 px for product shots)
- Contrast: moderate
- Shift Edge: slightly negative to reduce fringe
For hair/soft edges, brush only boundary areas with Refine Edge Brush. Do not brush the entire subject.
4) Output to Layer Mask
Set output to New Layer with Layer Mask (or Layer Mask on the active layer). Keep edits reversible.
5) Remove residual halos fast
Halos happen when old background pixels stay in edge semi-transparency.
Try this order:
- In Select and Mask, move Shift Edge slightly inward.
- Use Layer > Matting > Defringe (light touch).
- If needed, paint mask edges with a soft brush at low flow.
- Add a Hue/Saturation clipped layer and reduce saturation on fringe colors only.
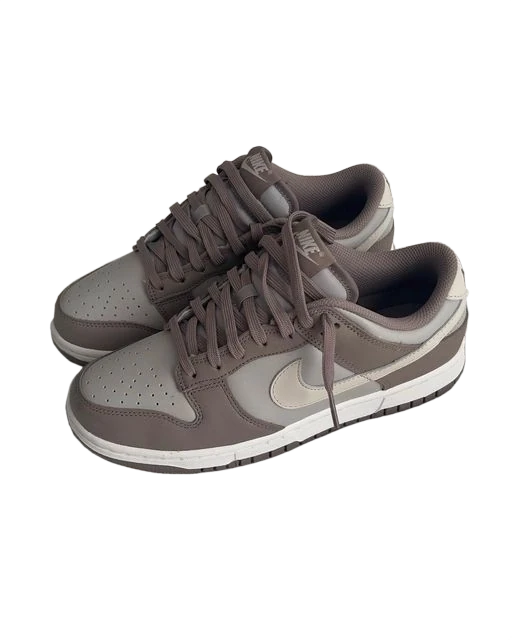
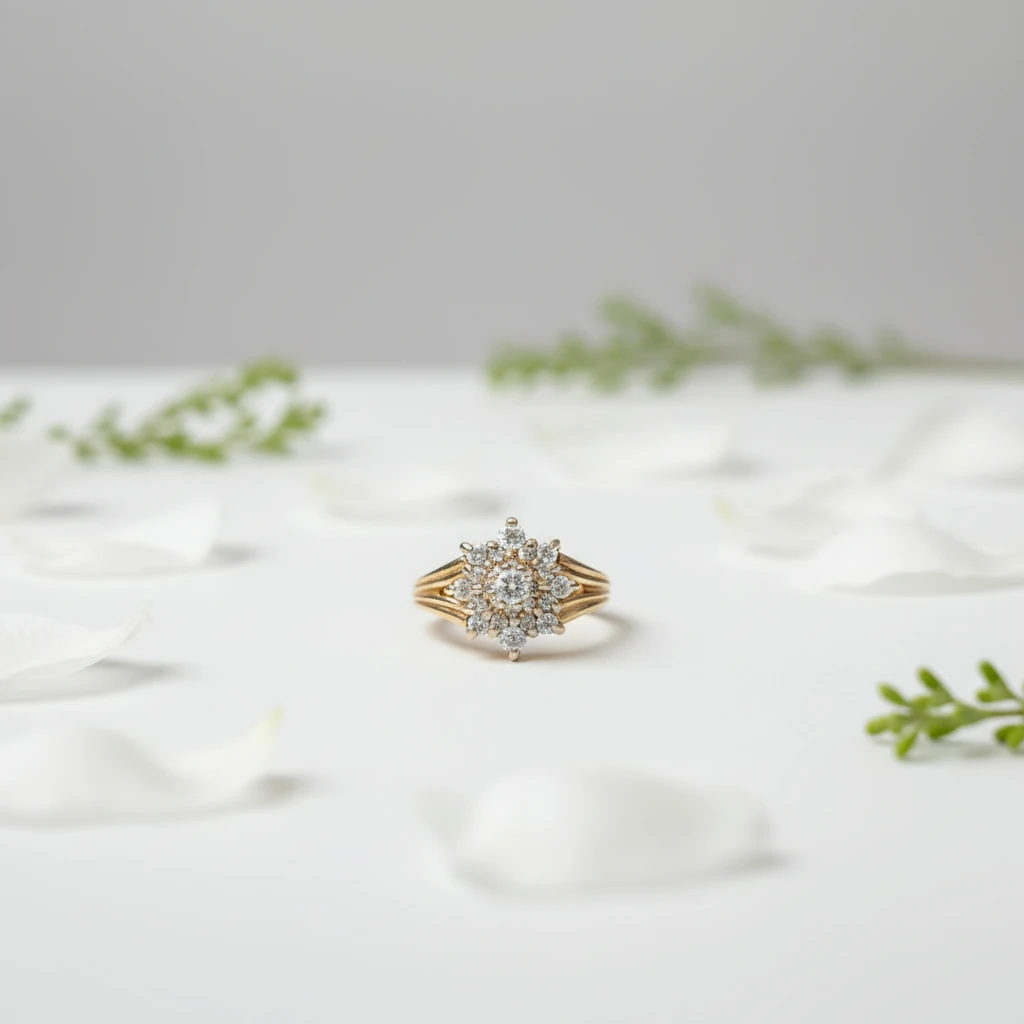
Practical examples: what clean cutouts should look like
The goal is not “looks fine at 100% zoom on white.” The goal is “looks natural on multiple real backgrounds.”


In this comparison, edge fidelity improves because boundaries are tightened before export. This is what you want for product catalog consistency.


Here, the main improvement is halo reduction around high-contrast boundaries. That matters when the same image appears on marketplace white and darker social backgrounds.


This example demonstrates cleaner edge transitions where minor fringing would otherwise be visible on ad creatives and PDP hero slots.
Clean-edge QA checklist (use this every time)
Do not ship a cutout before these checks:
- 200% zoom perimeter sweep
- Inspect the entire contour, not just tricky zones.
- Dual matte check
- Test on pure white and near-black background layers.
- Color fringe check
- Look for cyan/green/magenta contamination at edges.
- Small-size legibility check
- Scale to thumbnail and verify object silhouette remains clear.
- Export sanity check
- PNG transparency for web; verify no unexpected matte color in destination platform.
If the image fails any check, go back to mask refinement instead of over-sharpening the entire image.
Common problems and fast fixes
Problem: Jagged edges
Cause: too little smoothing, rough manual selection, or low-res source.
Fix: tiny smooth increase, mild feather, slight contrast bump, then refine mask manually at low flow.
Problem: White or dark halo
Cause: edge contamination from original background.
Fix: negative Shift Edge, defringe lightly, plus targeted desaturation on fringe colors.
Problem: Hair looks cut out with scissors
Cause: hard-edge treatment applied to soft detail.
Fix: use Refine Hair only on relevant boundaries, preserve interior detail, avoid aggressive contrast.
Problem: Transparent product parts disappear
Cause: selection collapsed into opaque/transparent binary.
Fix: refine through channels or manual grayscale mask adjustment for semi-transparent regions.
Photoshop vs speed at scale: when to bring Lumabox into the workflow
Photoshop is excellent for precision work and difficult edges. But if your team processes dozens or hundreds of product images weekly, consistency and throughput become the bottleneck.
A practical production pattern is:
- Use Photoshop for difficult hero cutouts and edge-sensitive exceptions.
- Use Lumabox Background Replacer for repeatable clean-background variants.
- Use Product Photo Enhance for final output quality and sharper listing-ready assets.
- Use Product Photo Shoot when you need additional scene variants after the base cutout is validated.
That sequence keeps quality standards from Photoshop while reducing manual rework in high-volume pipelines.
If you want a technical comparison of automation approaches, read image background removal technology comparison. For practical touch-up guidance after cutout, see how to edit product photos.
Suggested testing protocol for your team
To decide whether your current cutout process is good enough, run a 20-image benchmark:
- 8 hard-edged products
- 6 soft/fabric edges
- 4 hair/fur boundaries
- 2 transparent/translucent materials
Track:
- Time per image
- First-pass acceptance rate
- Rework cycles needed
- Visible fringe defects after export
If first-pass acceptance is low or rework is high, standardize selection presets and QA steps first. Then evaluate whether Lumabox follow-on workflows reduce production variance.
FAQ
What is the best Photoshop tool to cut out an image?
For most cases, start with Object Selection and refine in Select and Mask. Use Pen Tool for strict geometric precision and channels/manual masks for complex transparency.
How do I get clean edges when cutting out hair?
Use Select and Mask with Refine Hair only along boundary regions, then validate on contrasting backgrounds to catch halos and edge contamination.
Why does my cutout look fine in Photoshop but bad after export?
You likely skipped matte checks on dark/light backgrounds or exported with edge contamination. Always run dual-matte QA before final export.
Should I do all cutouts manually in Photoshop for ecommerce?
Not always. Manual Photoshop works for critical hero images and complex edge cases. For recurring catalog variants, combine Photoshop precision with Lumabox workflows to improve consistency and speed.
How do I choose between a tutorial-style workflow and production tooling?
Use tutorial-style Photoshop steps when you need one-off control and edge-specific fixes. Use Lumabox production workflows when output volume, turnaround time, and consistency are your top priorities.
Final workflow summary
If your goal is clean, publish-ready cutouts, the key is a repeatable system: pick method by subject, refine masks deliberately, and enforce edge QA before export. Photoshop gives you control; production reliability comes from pairing that control with standardized workflows.
Ready to scale the process after your first clean cutouts? Review options on our pricing page.