


Key Takeaways
- Product retouching is the process of cleaning, correcting, and standardizing product images so color, edges, and detail match what customers receive.
- How to edit product photos for website use follows a repeatable pipeline: isolate the subject, fix exposure and white balance, sharpen for web, then export at consistent crops and aspect ratios.
- DIY photoshopping a photo still works for small catalogs, but AI tools remove repetitive masking and relighting work at scale.
- LumaBox AI bridges DIY capture and commercial polish—upload a simple shot, generate on-brand scenes, and export listing-ready files from the Product Photo Shoot workspace.
How to Edit Product Photos: A Practical Guide for Ecommerce Teams


When shoppers cannot hold your product, the image does the selling. Learning how to edit product photos is how you turn “good enough” captures into assets that reduce returns, lift trust, and read clearly on category pages. This guide moves from fundamentals—what product retouching actually means—to modern workflows that replace hours of manual photoshopping a photo with repeatable, brand-safe output.
If you are starting from a DIY product photography setup, you already have half the battle won: a stable camera, controlled light, and a clean subject beat almost any filter. The other half is disciplined post-production and, when volume grows, tooling that preserves consistency without hiring a full studio bench.
What Is Product Photo Editing?
Product photo editing is the set of adjustments applied after capture to make an item look accurate, legible, and consistent across a catalog. It typically includes background handling, exposure and color correction, dust and blemish cleanup, sharpening for screen viewing, and export settings that match each sales channel.
Product retouching narrows that definition to pixel-level refinement: removing stray fibers, softening overly harsh specular highlights, and cleaning edges so cutouts look natural rather than “stamped on.” Retouching is still editing, but it emphasizes fidelity and finish over creative scene building.
For a capture-first foundation before you edit, see our guide to DIY product photography setup—better inputs mean fewer corrective edits later.
How to Edit Product Photos for Website and Marketplace Listings
How to edit product photos for website and marketplace use breaks down into stages you can teach any teammate: prepare the file, correct global light and color, isolate or standardize the background, refine local detail, then batch-export with naming conventions your CMS or PIM expects.
Step 1: Organize Files and Non-Destructive Layers
Rename shots by SKU and angle (SKU001_front, SKU001_detail). Work on duplicates, keep a master RAW or high-resolution TIFF if available, and avoid destructive edits until export. This single habit prevents the most expensive mistake in product retouching: accidentally baking in a bad white balance across an entire set.
Step 2: Global Corrections (Exposure, Contrast, White Balance)
Adjust exposure so the product’s brightest meaningful detail is not clipped and shadows still show texture. Set white balance using a neutral reference in-frame or a gray card from the shoot. Direct answer: White balance is the correction that removes unwanted color casts so white and gray surfaces read neutrally; without it, “navy” reads as “purple” and return rates rise.
If the shoot itself was underexposed or unevenly lit, you can still recover usable files—our walkthrough on fixing bad lighting in product photos with AI covers rescue tactics and when to re-shoot instead.
Step 3: Isolate the Product or Standardize the Backdrop
For marketplaces that require pure white, isolate the product and place it on #FFFFFF (or the channel’s specified tolerance). For DTC sites, you might keep a subtle shadow or reflection—just keep the shadow consistent from SKU to SKU.
Direct answer: A clipping path is a vector outline used to separate a product from its background; masking is a pixel-based selection that can handle soft edges like hair or sheer fabric. Products with hard edges favor paths; fuzzy edges favor masks.


Step 4: Local Product Retouching
Remove dust, scratches, and label wrinkles that are not part of the real product. Soften only the distractions that mislead—never remove permanent features a customer will notice on delivery. Sharpen for screen: a modest unsharp mask or high-pass workflow usually outperforms heavy clarity sliders that create halos.
Step 5: Crop, Align, and Export
Match aspect ratio and padding across the catalog. Center the product’s visual mass, not necessarily its geometric center—bottles, handles, and asymmetric packaging need eye-led alignment. Export sRGB JPEG or WebP at the size your theme requires; keep a larger master for zoom.
When you are ready to skip the manual white-background treadmill, open the Product Photo Shoot workspace and generate consistent scenes from a single upload.
How to Make Product Pictures Look Professional (Photoshop and Equivalents)
Many founders ask how to make product pictures look professional photoshop style without a retoucher on payroll. Photoshop remains the reference standard for layered product retouching, but the workflow—not the logo in the dock—is what creates the “pro” look.
Direct answer: Photoshopping a photo, in a commercial sense, means combining selections, adjustment layers, and retouching tools to change localized appearance while preserving global realism. For products, the professional bar is simple: edges are clean, color is truthful, texture is visible, and lighting looks intentional.
Typical building blocks include:
- Curves and levels for controlled contrast instead of a single “brightness” slider.
- Hue/saturation targeted at specific color ranges so packaging reds stay red without neon shifting.
- Frequency separation (advanced) to address large-area tone separately from fine texture on fabrics and leather.


You do not need every advanced technique on day one. You need repeatability. For a deeper editorial map that connects classic steps to ecommerce outcomes, read our ecommerce product photo editing guide.
When to Move from DIY Edits to an AI-First Workflow
DIY edit product photo sessions make sense when you have ten hero images and time to fuss over each one. They stop scaling when:
- SKU counts jump and margins cannot support per-image retouching fees.
- You need multiple contexts—lifestyle, seasonal, channel-specific crops—from the same capture.
- Brand guidelines demand consistent shadow direction, surface contact, and color temperature across hundreds of files.
LumaBox AI is built for that transition. Upload a straightforward product capture, choose or prompt a scene aligned with your brand, and let the system handle integration-style relighting instead of hand-painting shadows. It is the fastest path from “I know how to edit product photos” to “my team ships weekly launches without a backlog.”
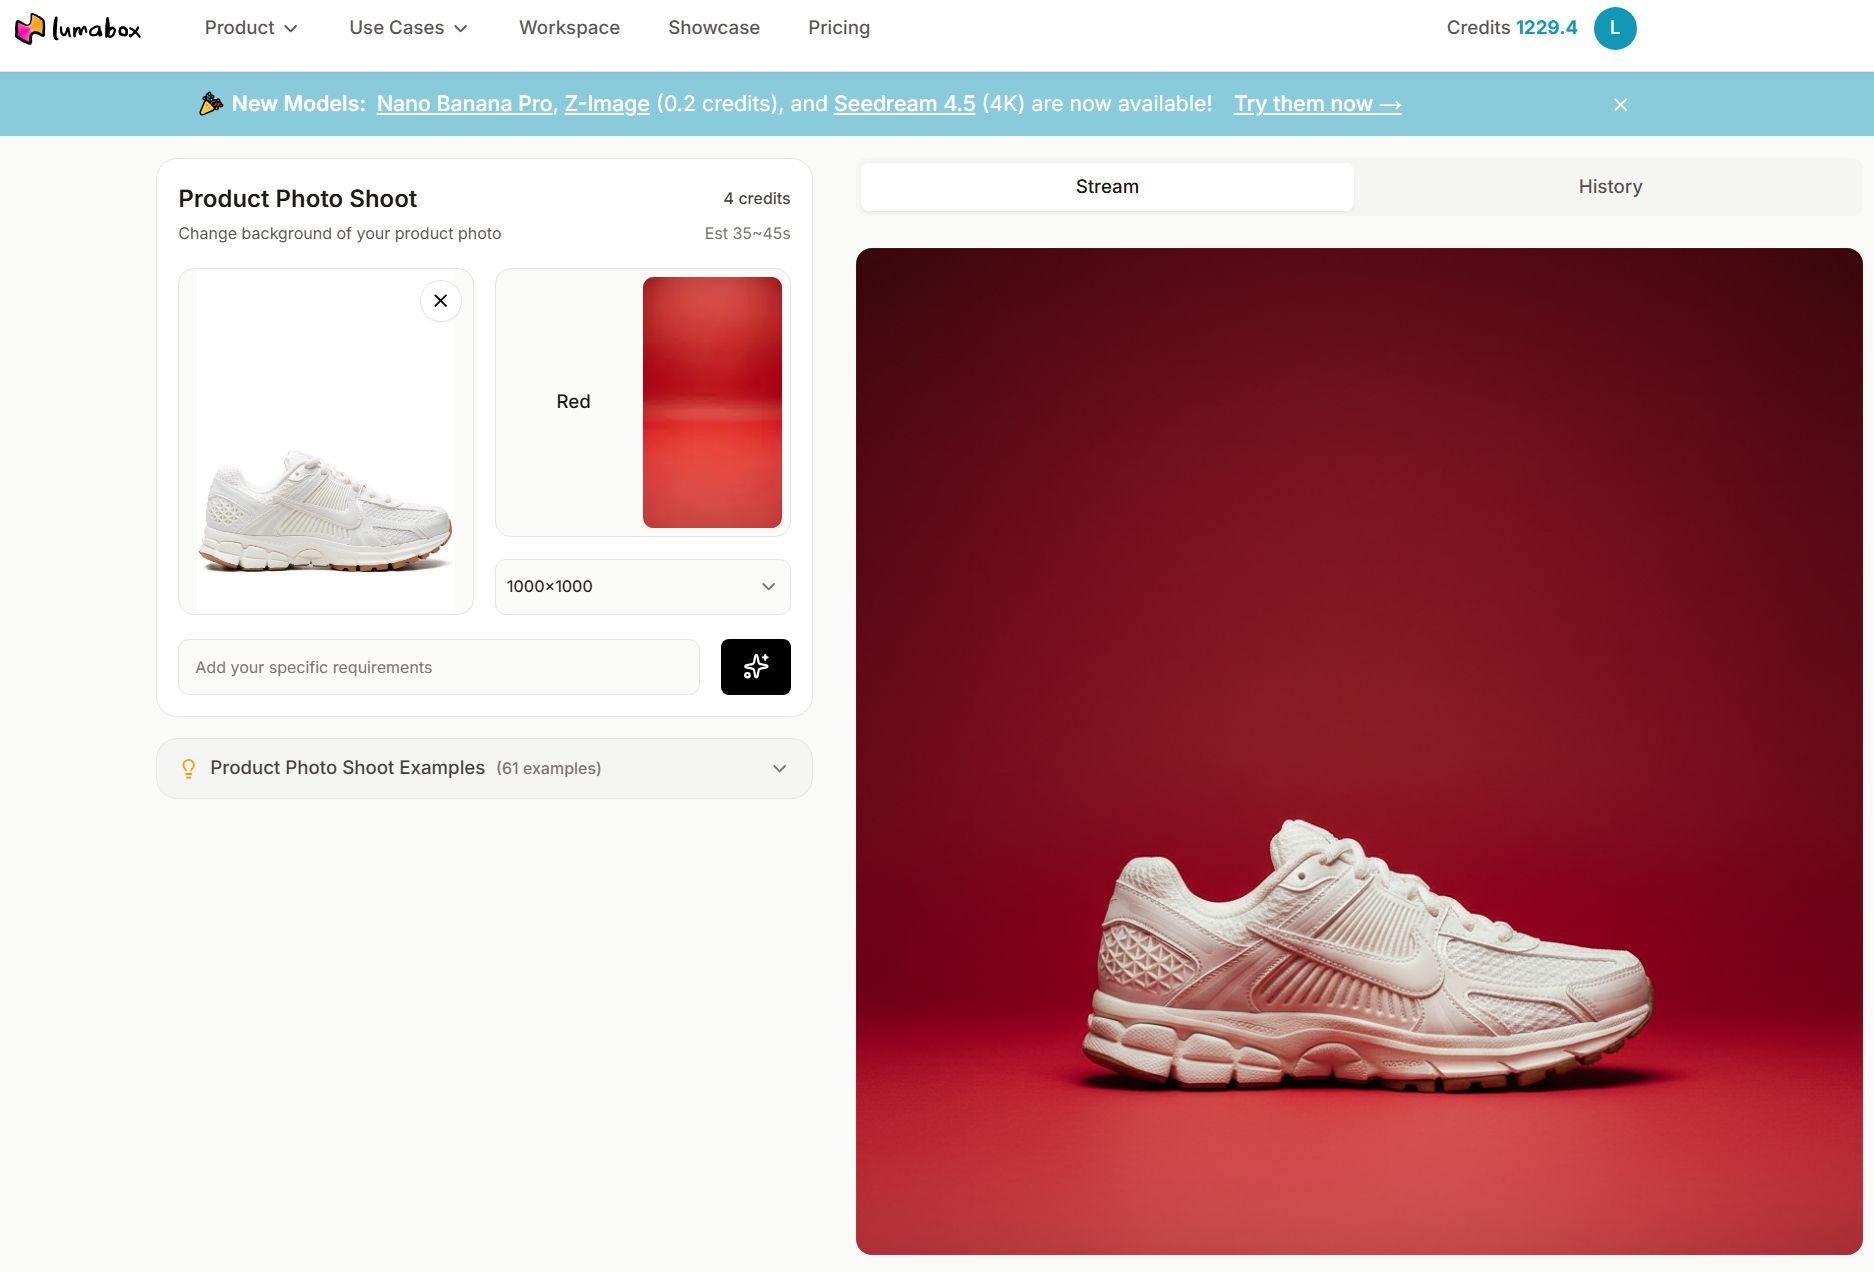
Start or scale that workflow anytime in the Product Photo Shoot workspace.
Quality Checklist Before You Publish
- Accuracy: Compare the edited file to the physical sample under neutral light.
- Edge integrity: No halos, no gray fringe on white backgrounds.
- Noise and sharpening: Detail visible at 100% zoom without grain explosion.
- File hygiene: sRGB profile embedded, filename matches SKU, alt text describes the product—not the marketing slogan.
Conclusion
How to edit product photos is not a single trick—it is a short pipeline you repeat until it feels boring. Master global color and exposure, treat product retouching as truth-telling rather than fantasy, and export with channel discipline. When volume and variation outgrow DIY photoshopping a photo, move the repetitive relighting and scene work into LumaBox AI so your team spends judgment on brand and merchandising—not on masking hairlines around bottle caps.
Ship your next set of listing and lifestyle shots from the Product Photo Shoot workspace.